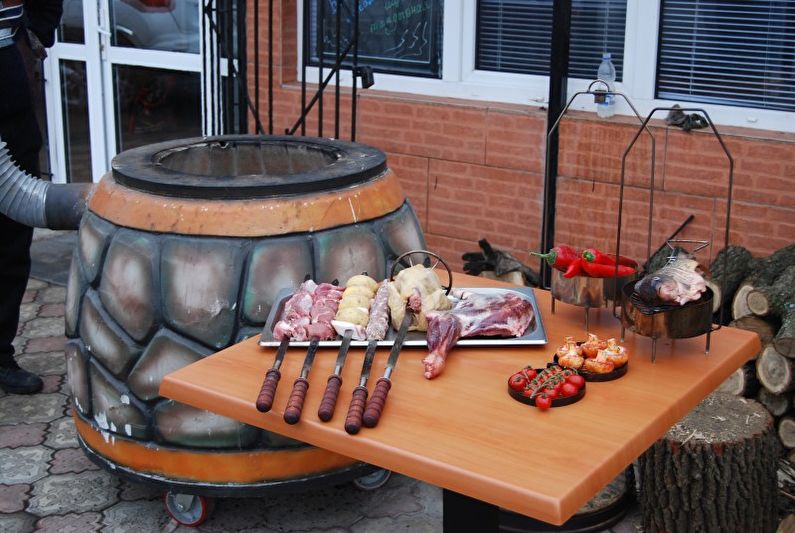
Recently, in private areas, you can increasingly find oriental kilns with an exotic name - tandoor. They are great for cooking outdoors and will surely impress your guests. What is especially nice - this device can be done with your own hands. How? Let's look at this issue in more detail!
The principle of operation of the tandoor
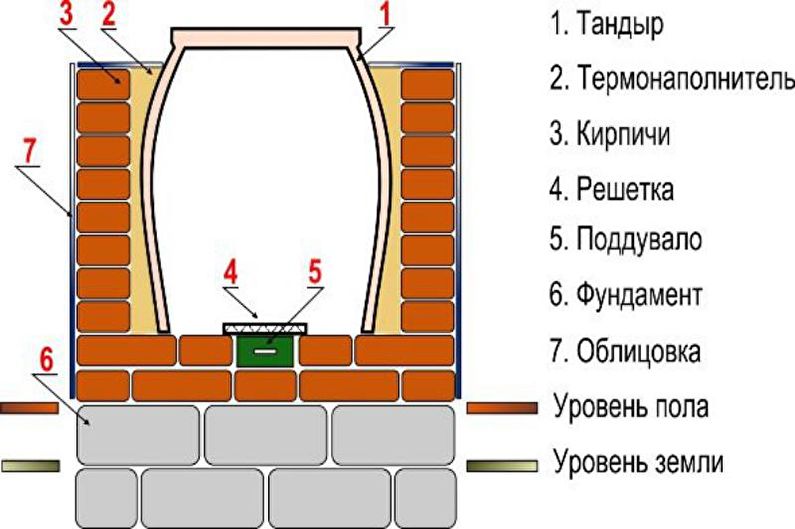
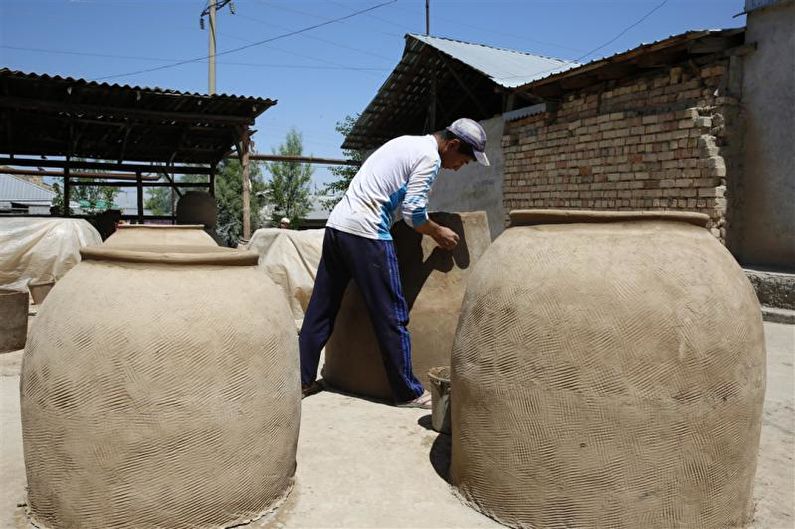
To understand how the tandoor works, we will describe the process of its operation using the example of a clay variant. This is one of the most popular variations of oriental stoves that are found in our area.
The air circulates thanks to the blowing - a special hole in the lower part that supports combustion. It is in the Uzbek variety that the clay bowl is lined with refractory bricks. The main secret is filling the voids between the brick and the walls of the clay bowl using sand or salt - this allows you to maintain the temperature for as long as possible.
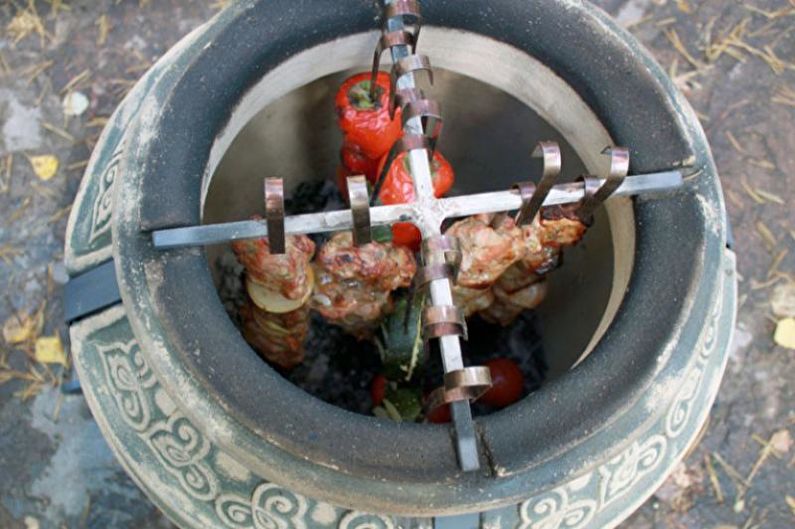
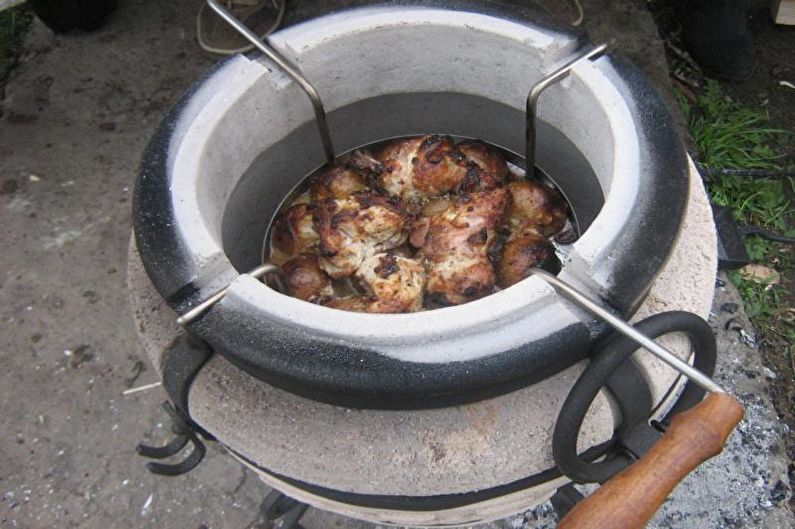
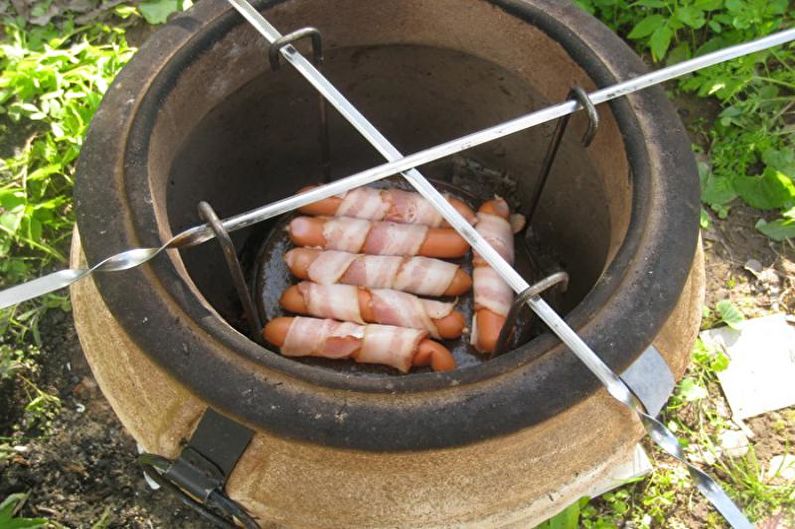
Coal or firewood is used as fuel. They are laid at the bottom of the boiler through the top, and then ignited. Dishes are prepared using a grill or skewers.
Tandoor is made only from materials with a high ability to retain heat. After heating, depending on the selected fuel, the temperature can reach 250-400 degrees Celsius. Thanks to the right materials, this furnace is able to maintain temperature for 5-7 hours.
DIY brick tandoor
In this section, we will look at how to build a tandoor using a brick. This is a very simple option that does not require unconventional materials and skills.
Training
Any type of construction work begins with careful preparation, as this is the key to a successful result. If you have experience in laying bricks, then the whole process will be quite simple for you. This is a fairly simple design, but if you are faced with masonry for the first time, then you should carefully read the construction algorithm and prepare all the necessary materials.
First of all, you need to calculate the required amount of material or use ready-made schemes that are accompanied by estimates. We have prepared for you standard instructions and a list of required materials. So, for starters you will need:
1. About 100-150 kg of a mixture of sand and gravel;
2. A grid for reinforcing - about 2 sq.m .;
3. 7 kg of cement (use better);
4. 60–70 pieces of fireclay bricks;
5. Fire-resistant mixture for laying fireplaces or stoves - 10-15 kg;
6. If you intend to paint the tandoor, purchase fireproof paint.
When all the necessary materials have already been prepared, take care of the availability of the necessary set of tools. Most likely, most of the items from the list can be found at your dacha or ask your neighbors, but even if you have to buy something, it will not ruin you. To build a tandoor from brick with your own hands, you need such tools:
- Plaster rule (preferably along the length of the base);
- A bucket or other container to knead concrete;
- Putty knife;
- A paint brush and a container for paint;
- Bulgarian, as well as circles on the stone.
As you can see, the list is not too big or exotic. Preparing all the fixtures will not be too difficult for you.
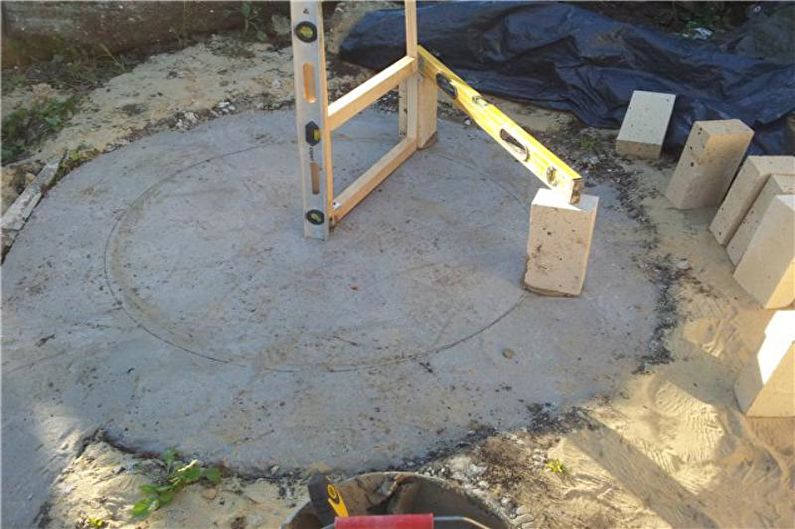
Foundation
For a long service life, the tandoor needs a very reliable foundation. It is he who will give a stable position to the entire building. Despite the fact that this is not a very heavy construction, much depends on the soil. For example, if it contains a lot of clay, then the base needs to be strengthened.
If the ground cover on your site is heavy, then use pillar-based supports. In the case of lighter soil, for example, sandy, it is necessary to pre-fill the concrete slab on which the furnace itself will be located.
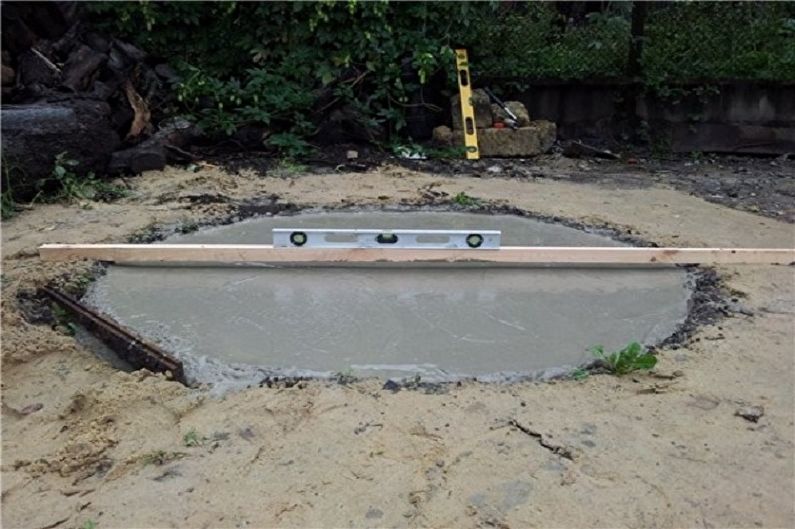
Based on our scheme and prepared materials, the area of the entire tandoor will be 100x100 cm. A concrete pillow with a thickness of at least 10 cm will be sufficient to maintain a structure with such an area.
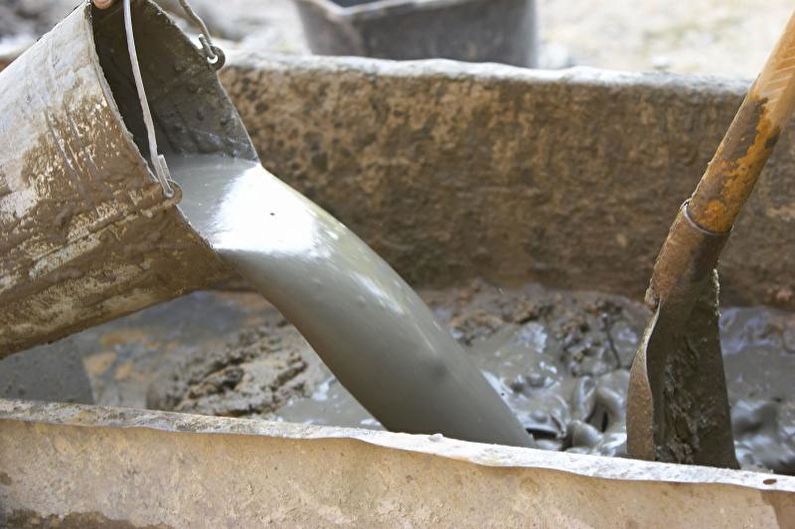
Proper and good concrete looks like thick gray sour cream. To prepare it, you must adhere to the following proportions: 3 fractions of sand, 1 fraction of gravel with a fraction of not more than 1 cm, 1 proportion of cement. If you adhere to these recommendations, you will get an excellent mixture.
Try to correctly calculate the required amount of concrete mix, for this you can navigate by the size of the pit for filling the slab. Build a timber formwork for a flat foundation. Cover the bottom of the pit with a layer of sand of about 5 cm, then pour water. Sand serves as a damper pad, which positively affects the durability of the building. Follow all the recommendations, and you will get a flat and proper concrete slab for the foundation. Remember to use a level so that the base of your structure is as even as possible.
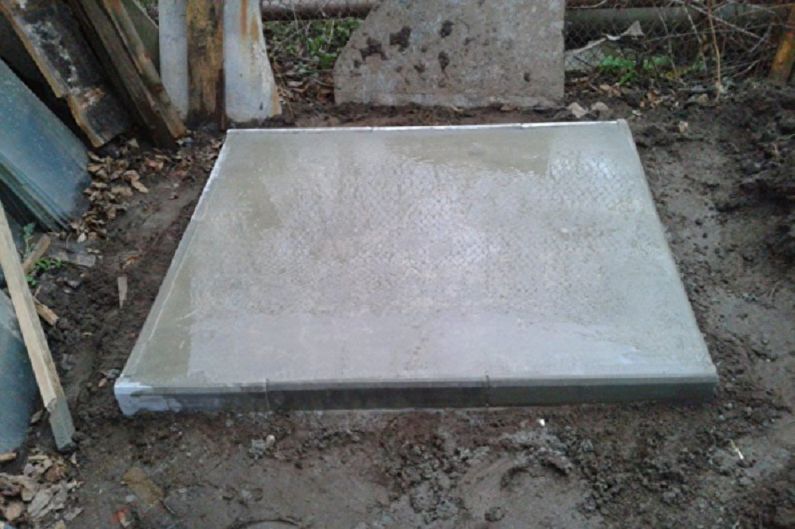
Concrete sets not earlier than three days after pouring. The correct decision is to let it brew for about a week, and only then continue the construction of the tandoor. If there is hot and dry weather during the laying of the foundation, be sure to periodically treat the concrete with water so that it does not dry out and crack.
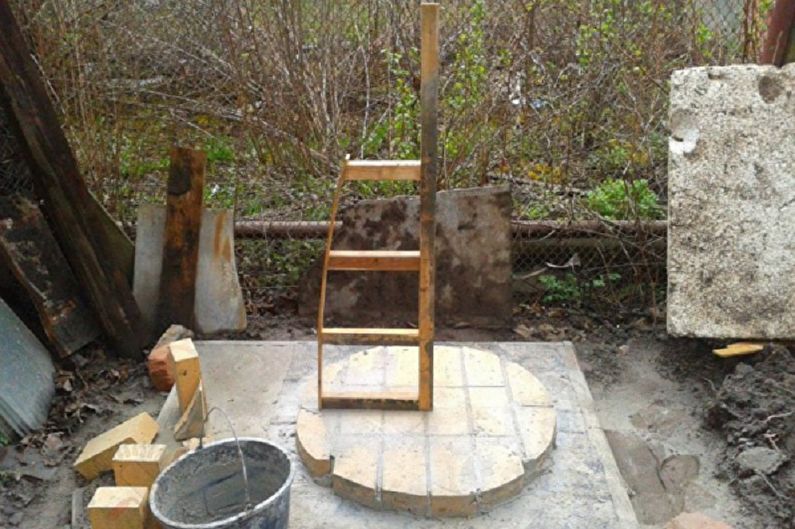
The base of the tandoor
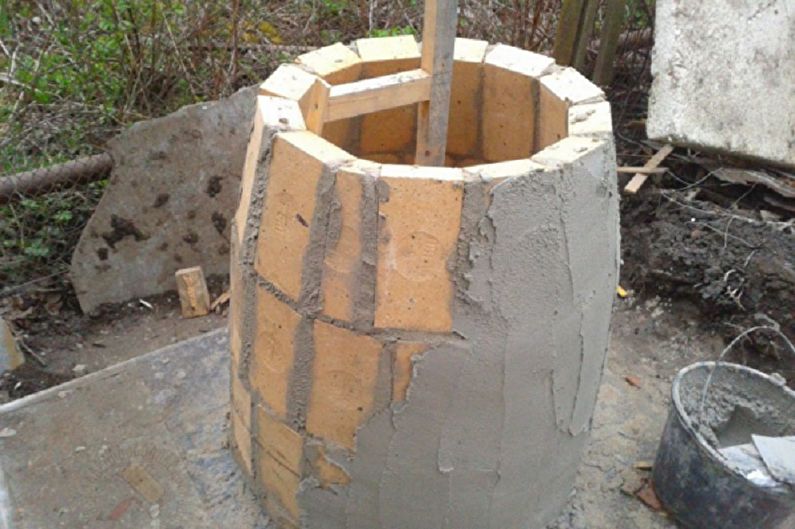
Refractory (fireclay) brick - an option that should be preferred, it does not absorb liquid, and also can withstand very high temperatures. In turn, the density of this material allows you to not collapse under the weight of the entire structure.
Another advantage of choosing this brick is its resistance to sharp temperature drops. That is why it should be used to build a tandoor on the street. This type copes with frosts, and it is also quite safe to light it in winter and use it for its intended purpose without fear of the integrity of the building.
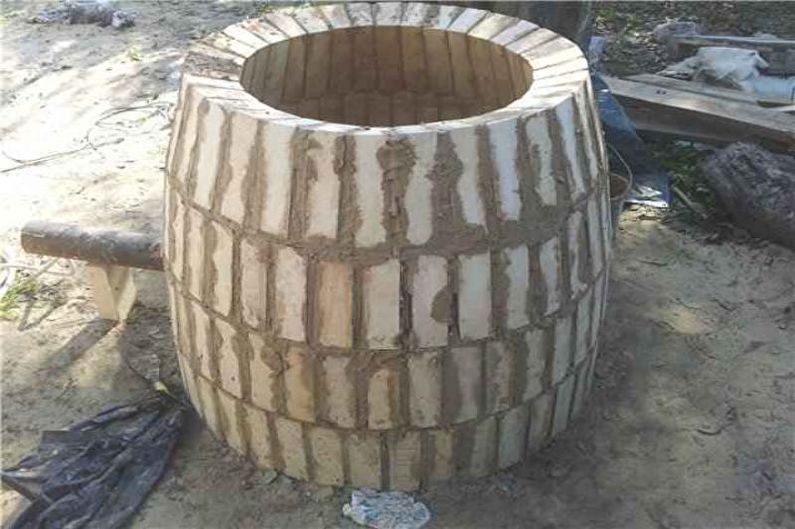
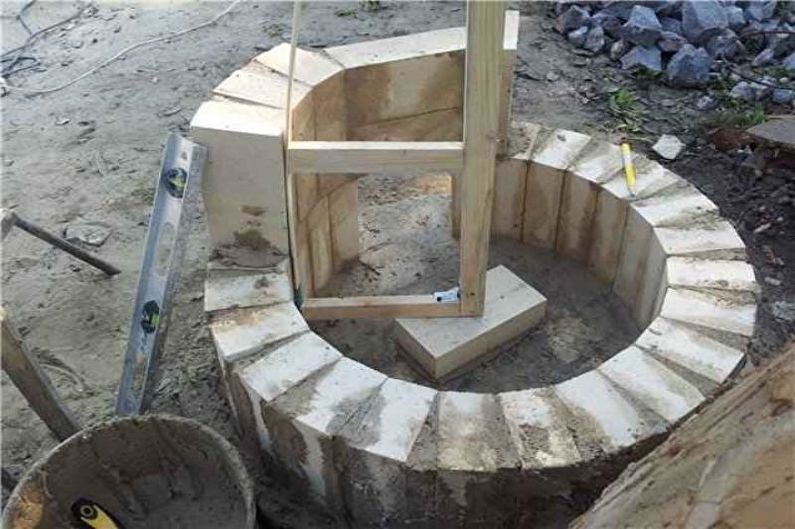
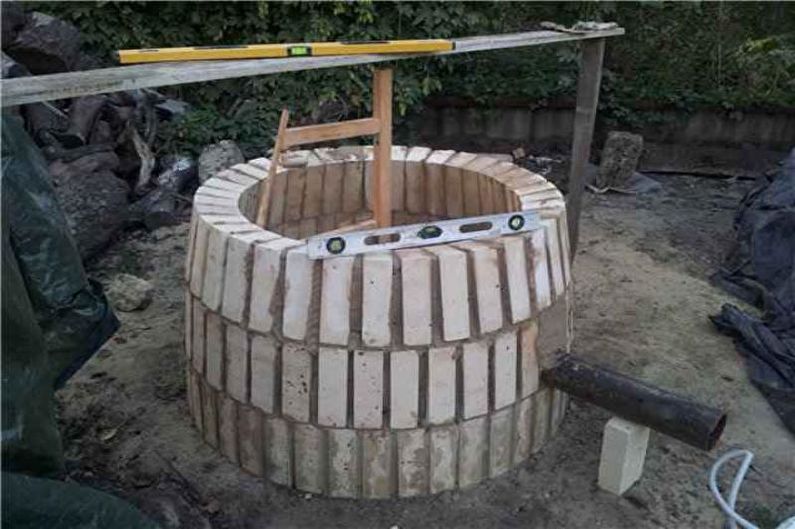
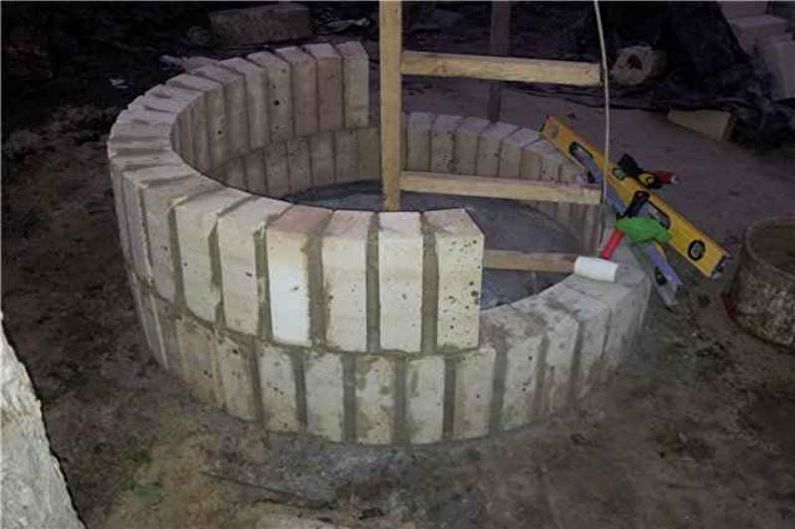
Lay the base in a circle, first laying a ruberoid under it. Lay out the bricks, then mark them and cut them with a grinder until they get the desired shape. Use only flame retardant mix for laying bricks.
The rule for masonry
Fulfilling the rule to start laying walls, you need to consider a number of features. The right decision would be to make the base equal to the height of the whole tandoor, and the ratio of base to top of the neck is 1 to 3. If you are making a furnace based on our recommendations for sizes, then to make a rule use a plank of wood with a height of at least 1 m, because the length of the rule base will be 30 cm.
For the production of patterns, usually use plywood. Painted or varnished plywood is ideal.
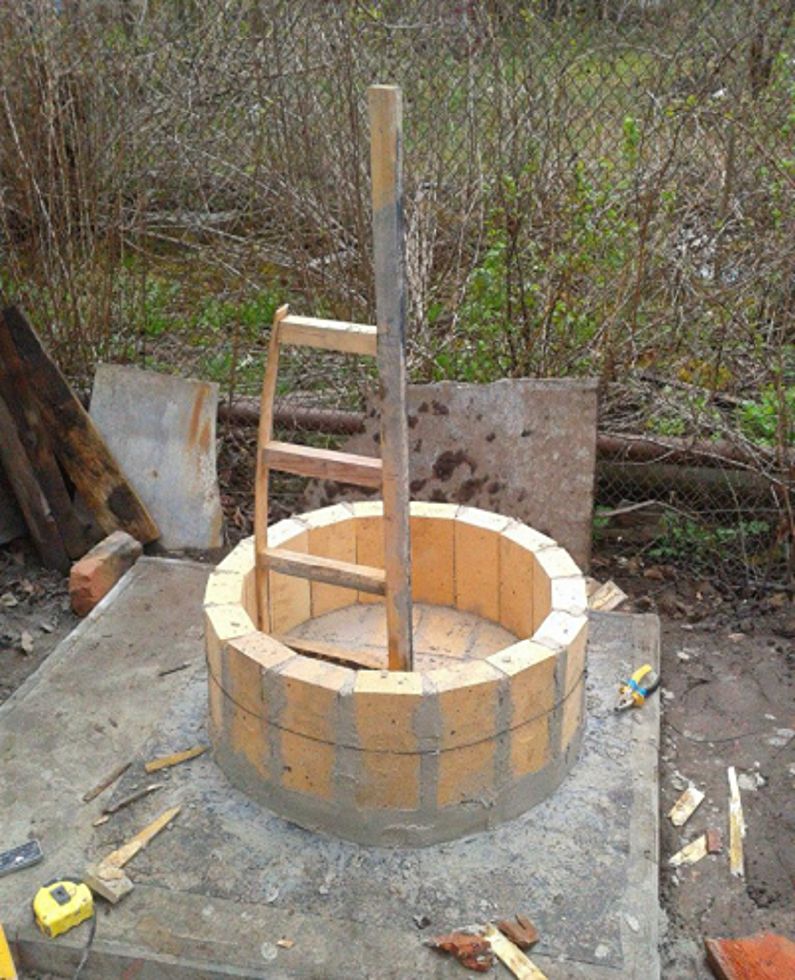
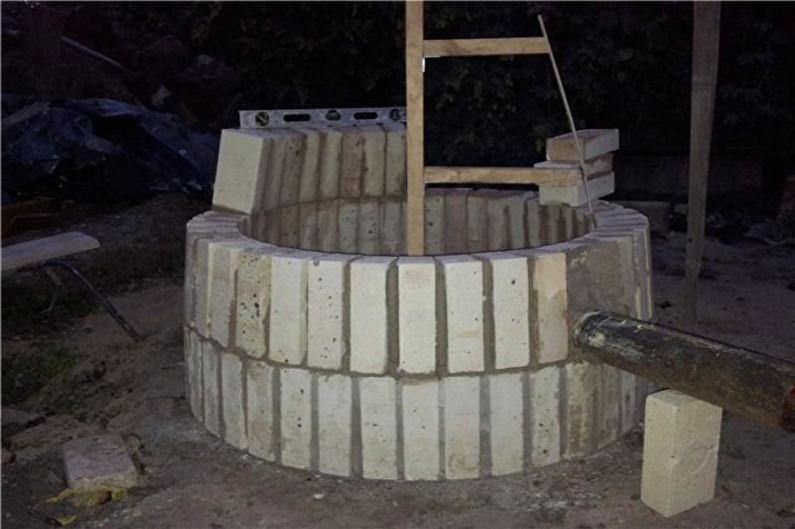
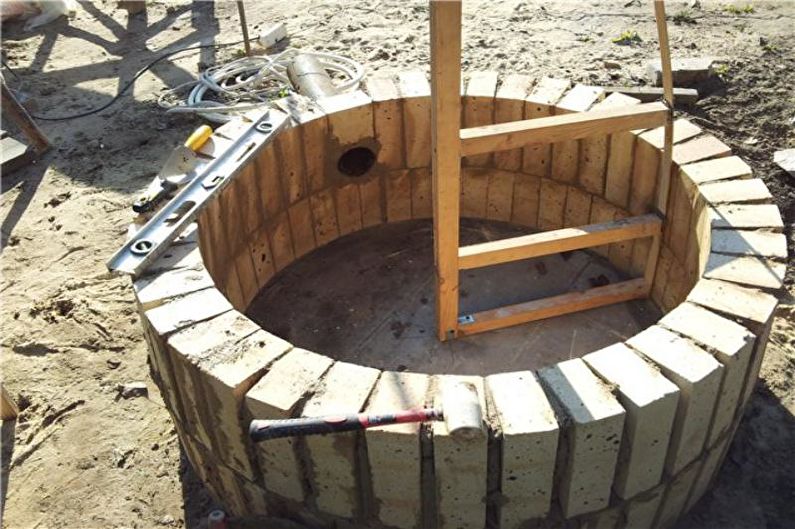
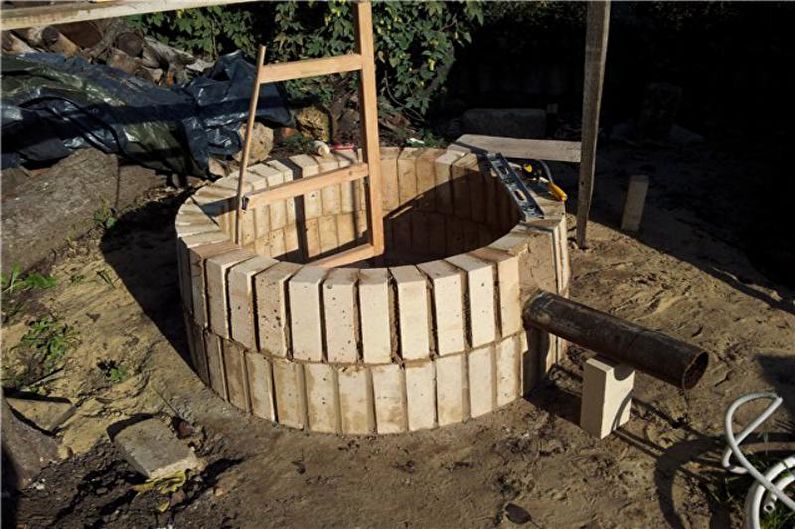
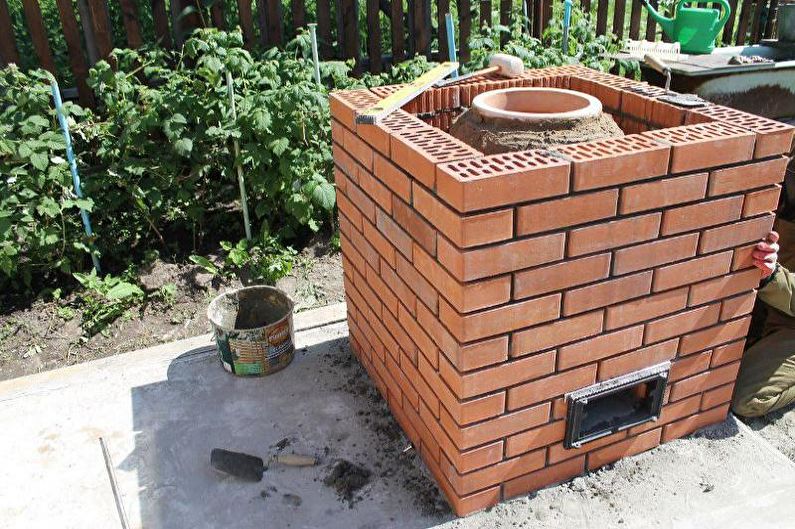
Tandoor walls
In our example, the bricks are stacked vertically, so you need a lot of mortar. Set the inner edges of the tandoor as tightly as possible to keep the walls as good as possible. Do not forget to thoroughly work out all the seams with the solution, you do not need to save on strength.
To reinforce the entire structure, use steel wire or reinforced mesh. If you use wire, then strengthen each row. In the case of a reinforced mesh, you can do only one revolution in a circle.
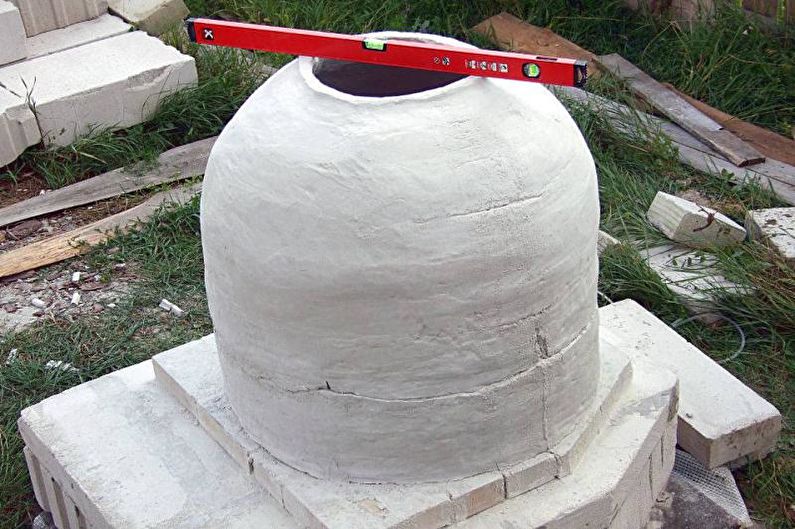
When you have completed the basic design, you can move on to the plaster. This must be done using the same oven mixture. Try to make a thickness of at least 10 mm.
Wait until the plaster has completely dried, for safe drying, you can wrap the structure with a film.
The dried construction can begin to be painted. You can apply refractory acrylic paint or whitewash. You can also use decorative plaster to decorate the tandoor, and only then - paint.
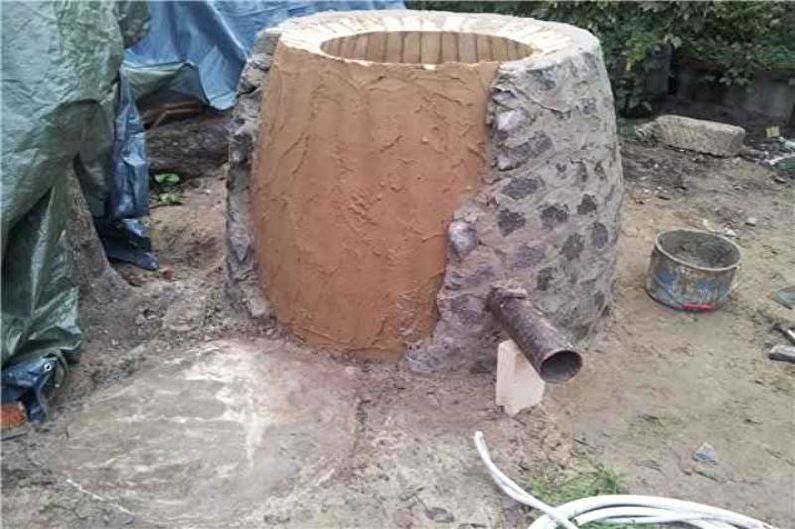
Do-it-yourself clay tandoor
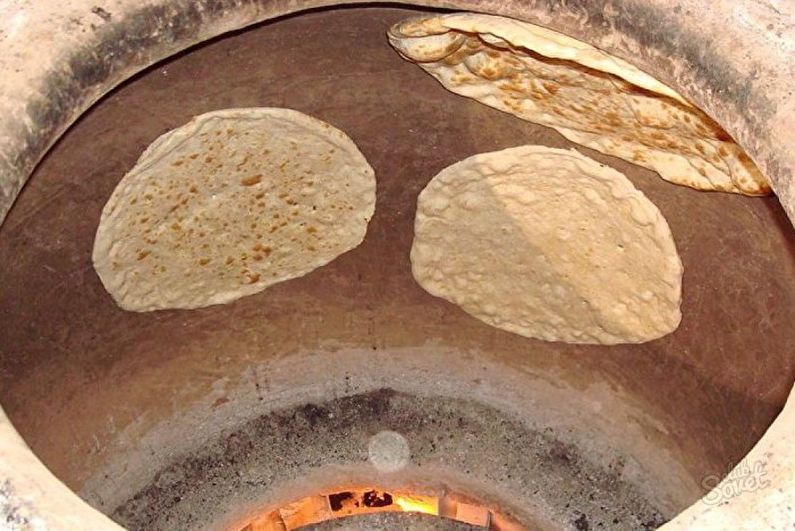
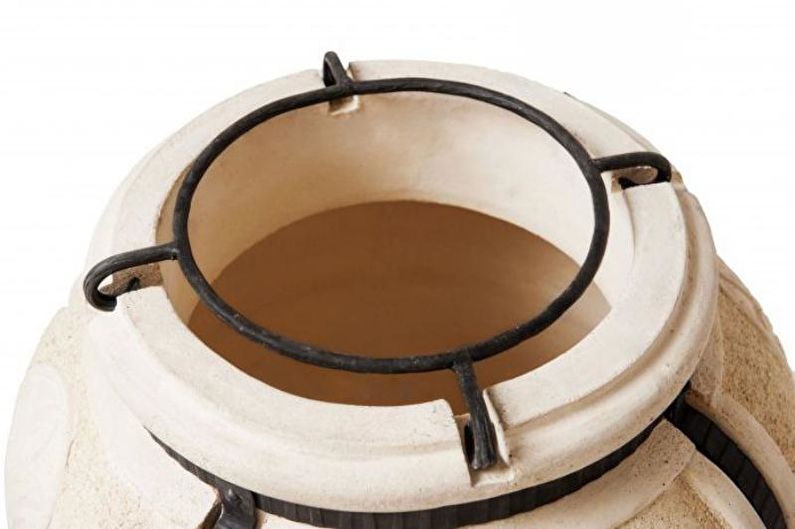
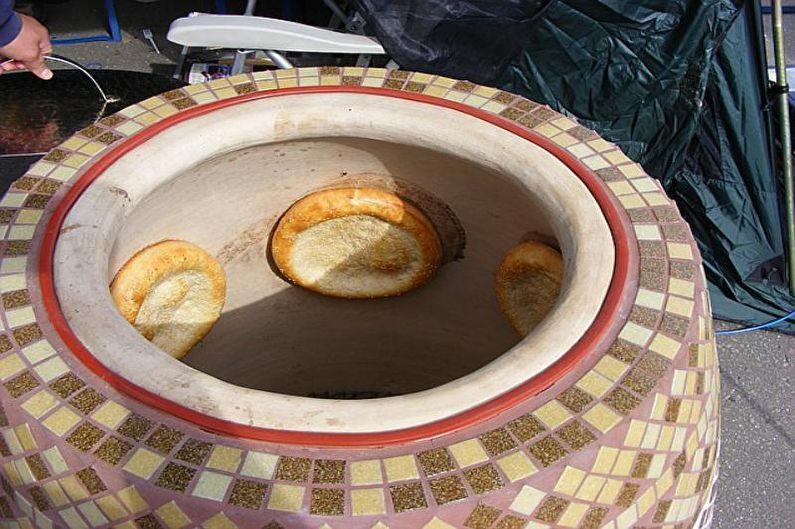
Next, we describe step-by-step instructions for building a tandoor using clay. This is a more complex and time-consuming method of manufacturing a furnace. Before proceeding to its construction, try to study the issue and think about whether you really need a clay specimen. It is worth noting that the main and, perhaps, the only difference from the brick option is the ability to bake cakes on clay walls.
The classic sizes of clay tandoor are: height from 1 to 1.5 m, diameter - about 1 m, top - 50 cm. Forming a clay bowl, use a mixture of kaolin clay and camel or sheep’s wool. When all materials are ready - go to work.
Clay mixture
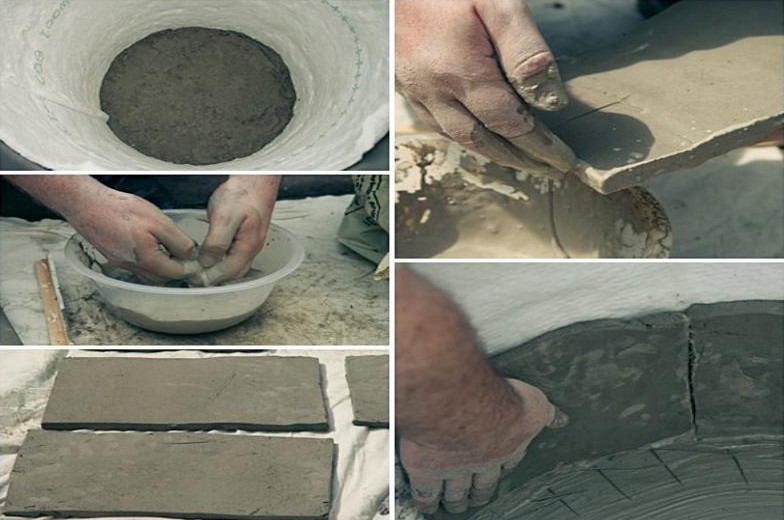
Cut wool 1–1.5 cm and mix with clay. You need to knead it to the consistency of thick gray sour cream. To make the clay strong and durable, leave it in a dark place for about a week. During the entire exposure time, remove excess moisture from the surface of the clay, but at the same time it should remain moist. Otherwise, when operating the tandoor, it will crack.
Blanks
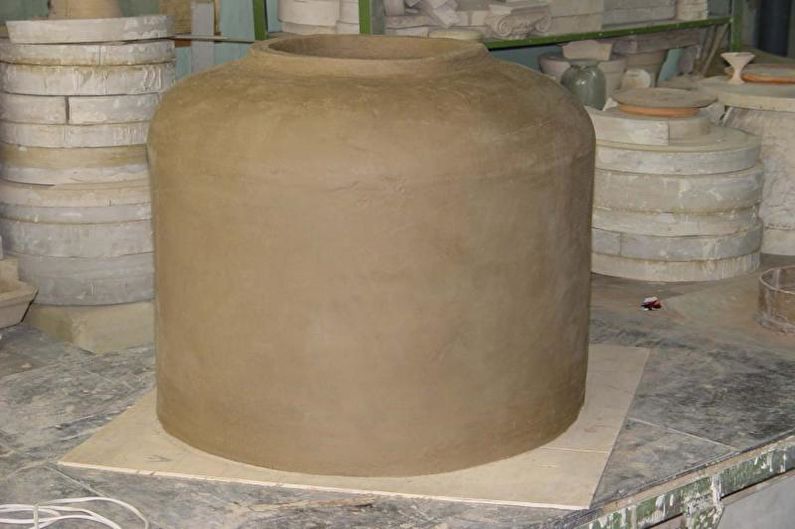
For the formation of the tandoor, it is necessary to prepare sheets of clay mixture with a thickness of about 5-10 cm. Then, in the traditional manufacture of them, they mold a cup of the furnace, but this method requires skills and considerable skills. If you are not ready to take risks and do everything traditionally, a barrel can help you.
When using it, you need to loosen the hoops and pour water. Leave for a week to swell. This will give it the necessary shape for making the tandoor. Drain the water, completely dry the barrel, and process the walls with butter from the inside. When it is absorbed a little, you can proceed to use the form. We advise you to prepare the clay mold and mixture at the same time.
Making tandoor from clay
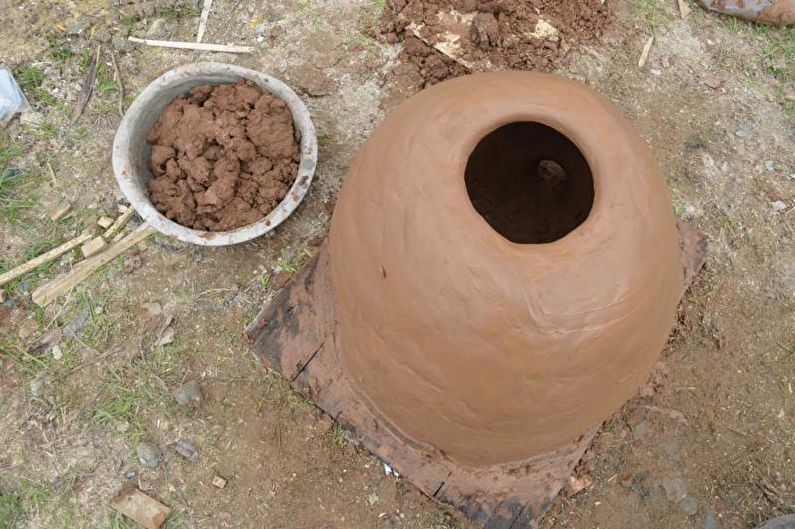
At this stage, it is already possible to begin to form a tandoor in the form or to roll sausages from a clay mixture with a diameter of not more than 5-7 cm and a length of up to 1 m, and already form a furnace from them. This does not play a big role, the main thing is to understand how you prefer.
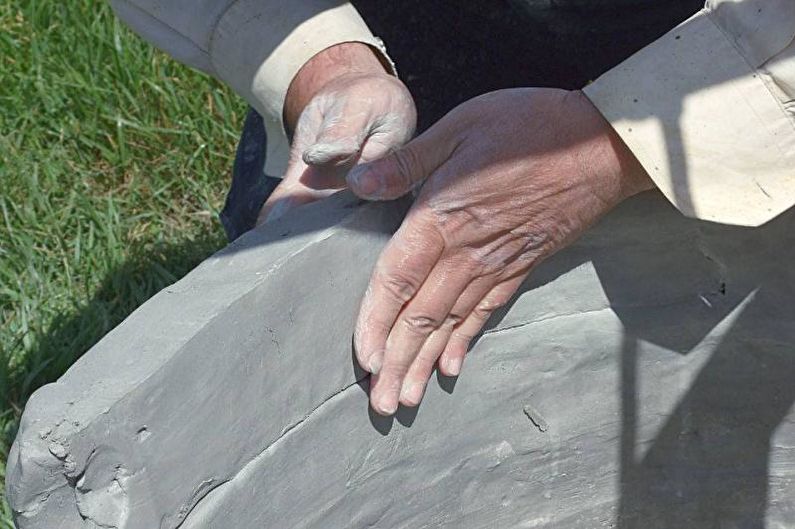
Place clay tightly on the walls of the barrel, then grease and connect the seams with your hands or a trowel. Collect all oven walls, but do not cover the bottom. The narrowing of the upper part should reach ½ of the entire diameter of the barrel.
When you have fully formed the shape of the oven, smooth the clay all over the inside. It should be as smooth as possible. Now leave the oven to dry.
Once the clay has dried, it will calmly lag behind the walls of the barrel. Remove the hoops, disassemble the barrel and take out the tandoor.

Installation
Place the oven on a prepared clay, concrete or refractory brick site. It must have a hole for air circulation, the so-called "blow". Combine the oven and the base with the same clay and let dry.
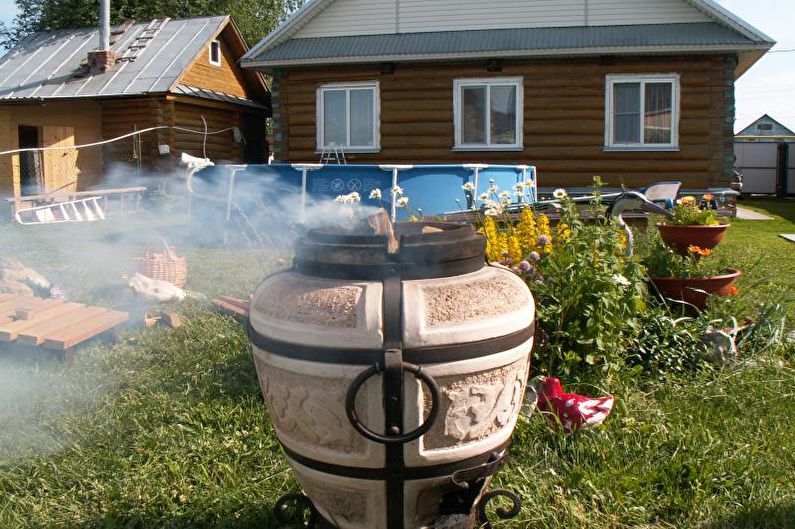
Already in this form, your personal tandoor is ready to use, but if you want it to keep the temperature as long as possible, you should cover it with brick, and fill the gap formed with sand or clay. This design will be able to maintain the temperature for 5-7 hours.

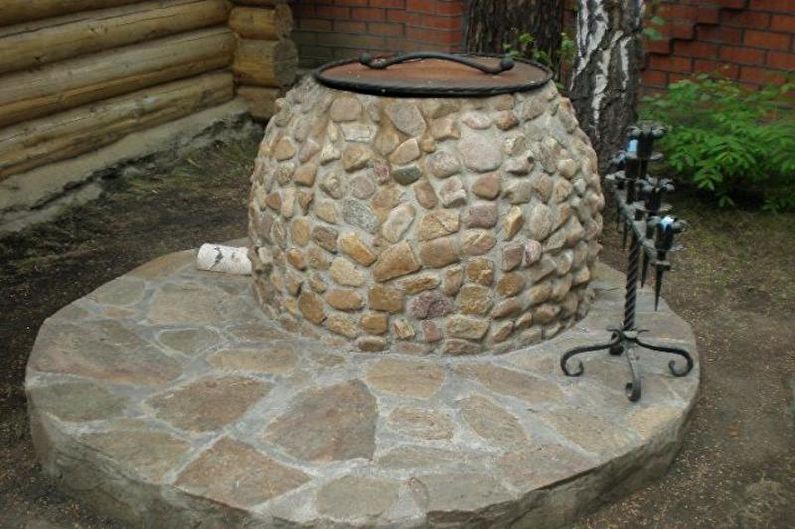
Tandoor - photo
Tandoor is a furnace with a long history, which is displayed on its appearance. You have a unique opportunity to create it yourself, so you probably would like to get acquainted with the variety in design and be inspired by traditional or modern variations of the tandoor. We have prepared beautiful photos to help you do this. Enjoy watching!


Video: How to make a tandoor do it yourself